
Purple Phoenix Shawlette

Purple Phoenix Shawlette
Once I dyed my own yarn I had to design at least few items. The yarn both the merino and alpaca are a dream to work with. I am converted into a pure natural protein fibers that is for sure.
The Phoenix shawlette is a very elegant accessory for the winter. It consist of 2 parts - the main body of the shawlette and the border. TThe pattern produces a slightly lacy fabric which is unique for the hollow herringbone stitch.
The pattern is in both USA and UK terminology.
INFORMATION
Yarn used -4ply, 100% merino wool, Cosmicgdesign Hand dyed yarn
Phoenix mix by cosmicgdesign – purple and teal, 100 g = 360m
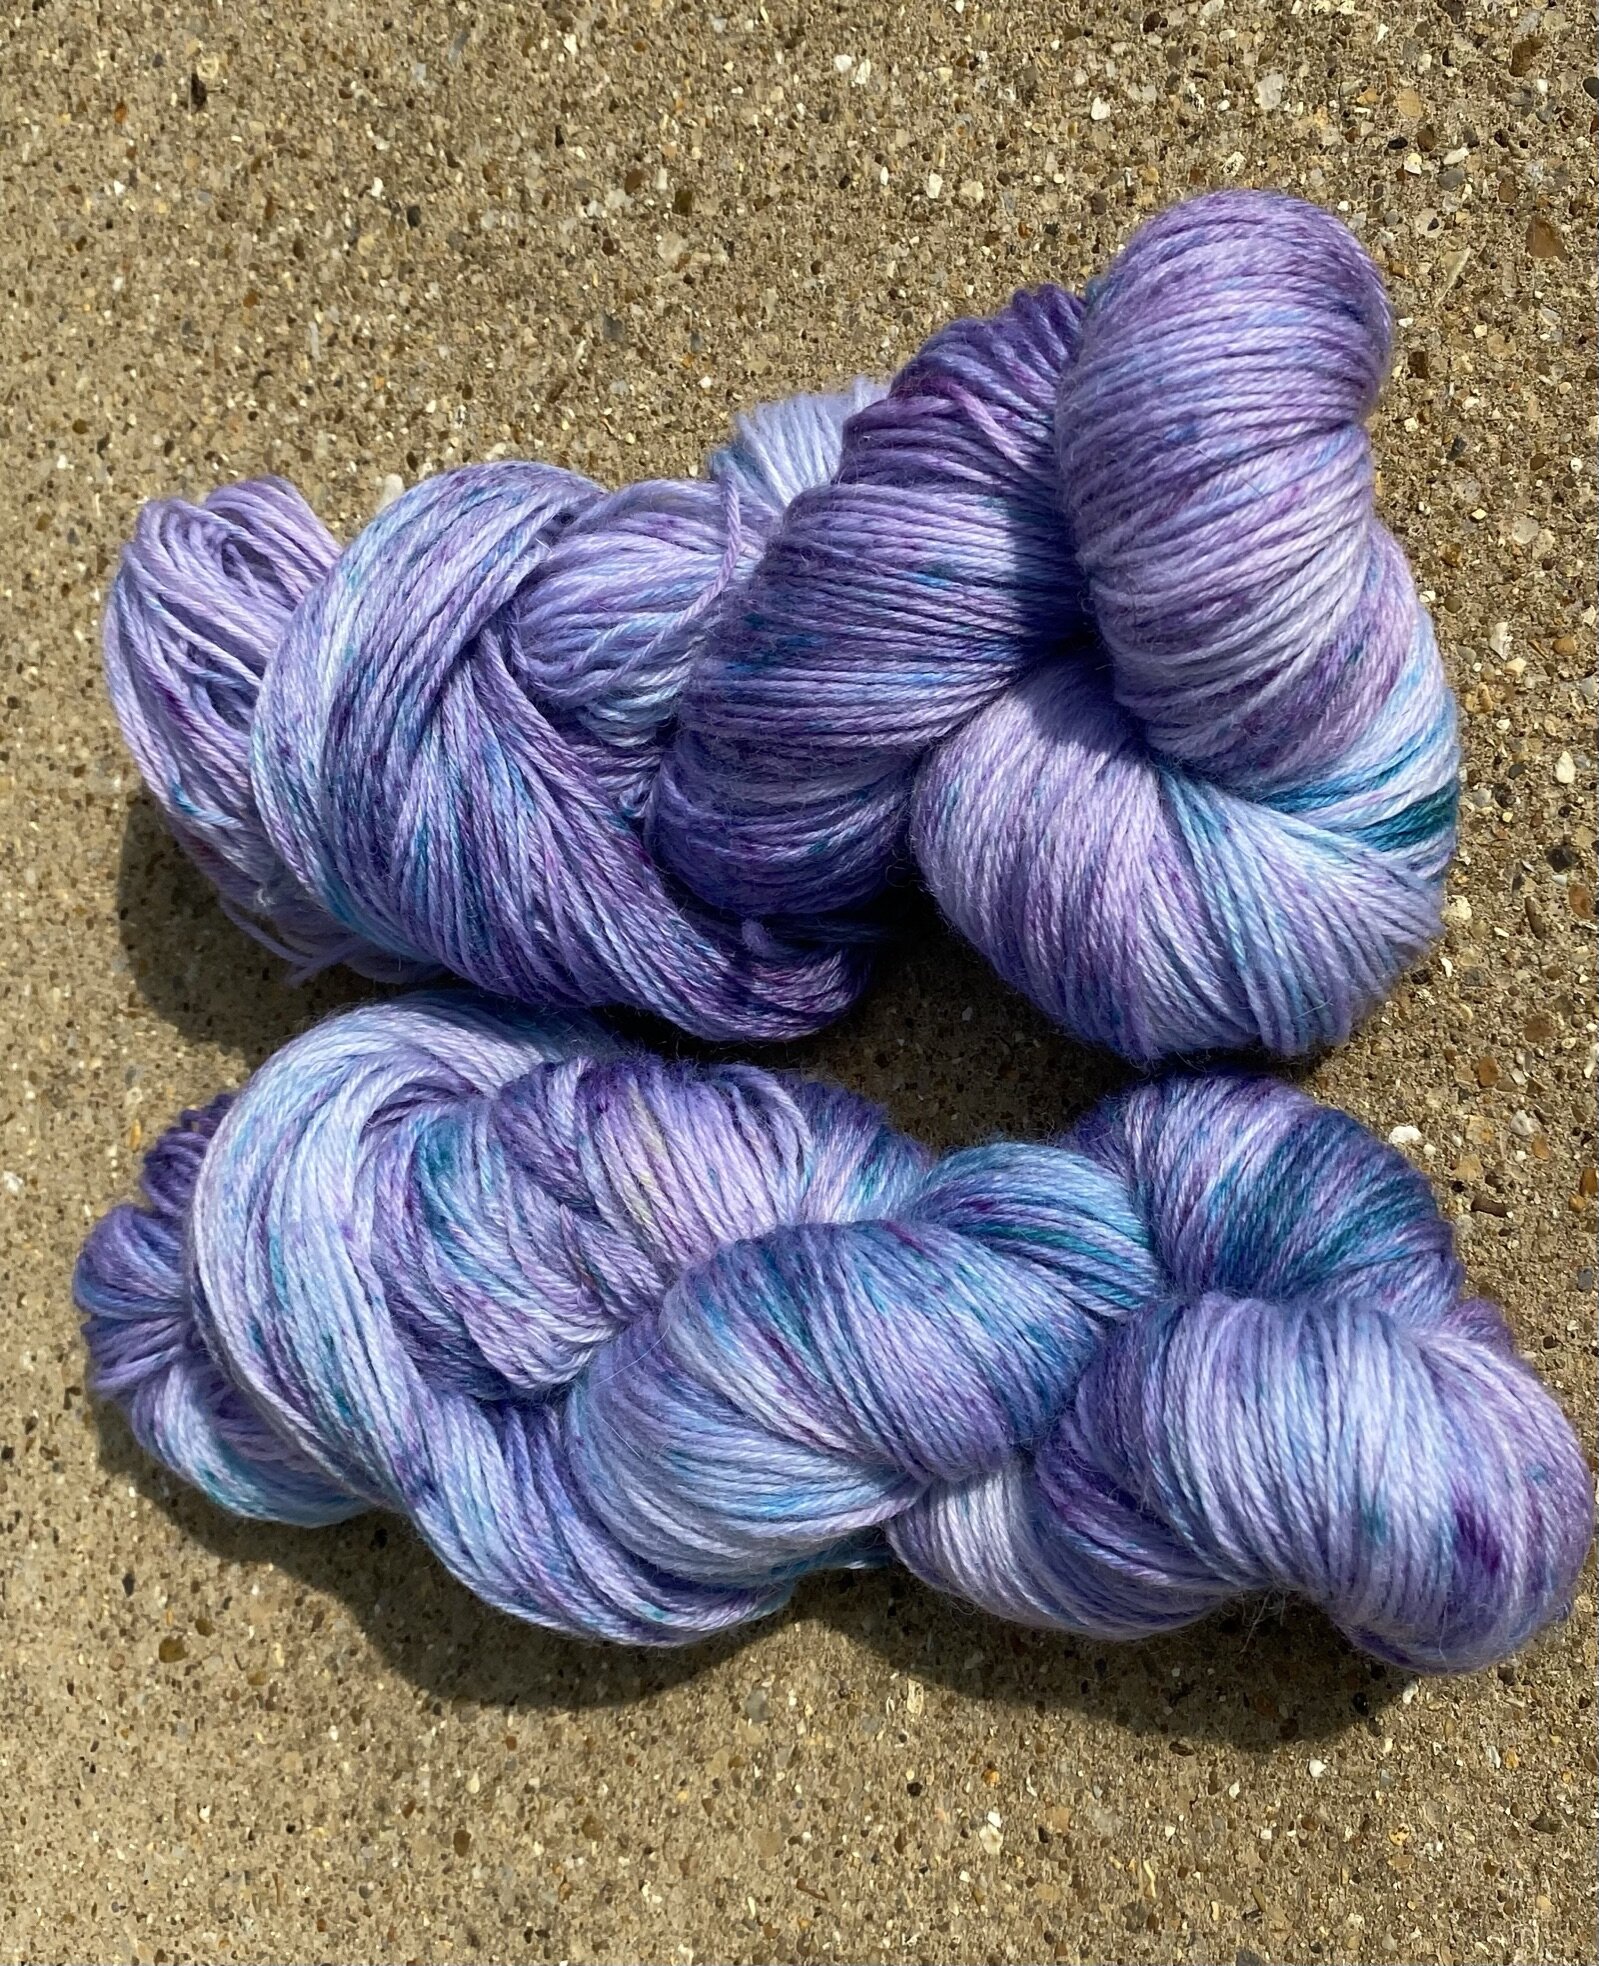
.Phoenix mix by cosmicgdesign – purple and teal, 100 g = 360m
Phoenix solid yarn by cosmicgdesign– purple, 70g = 250m
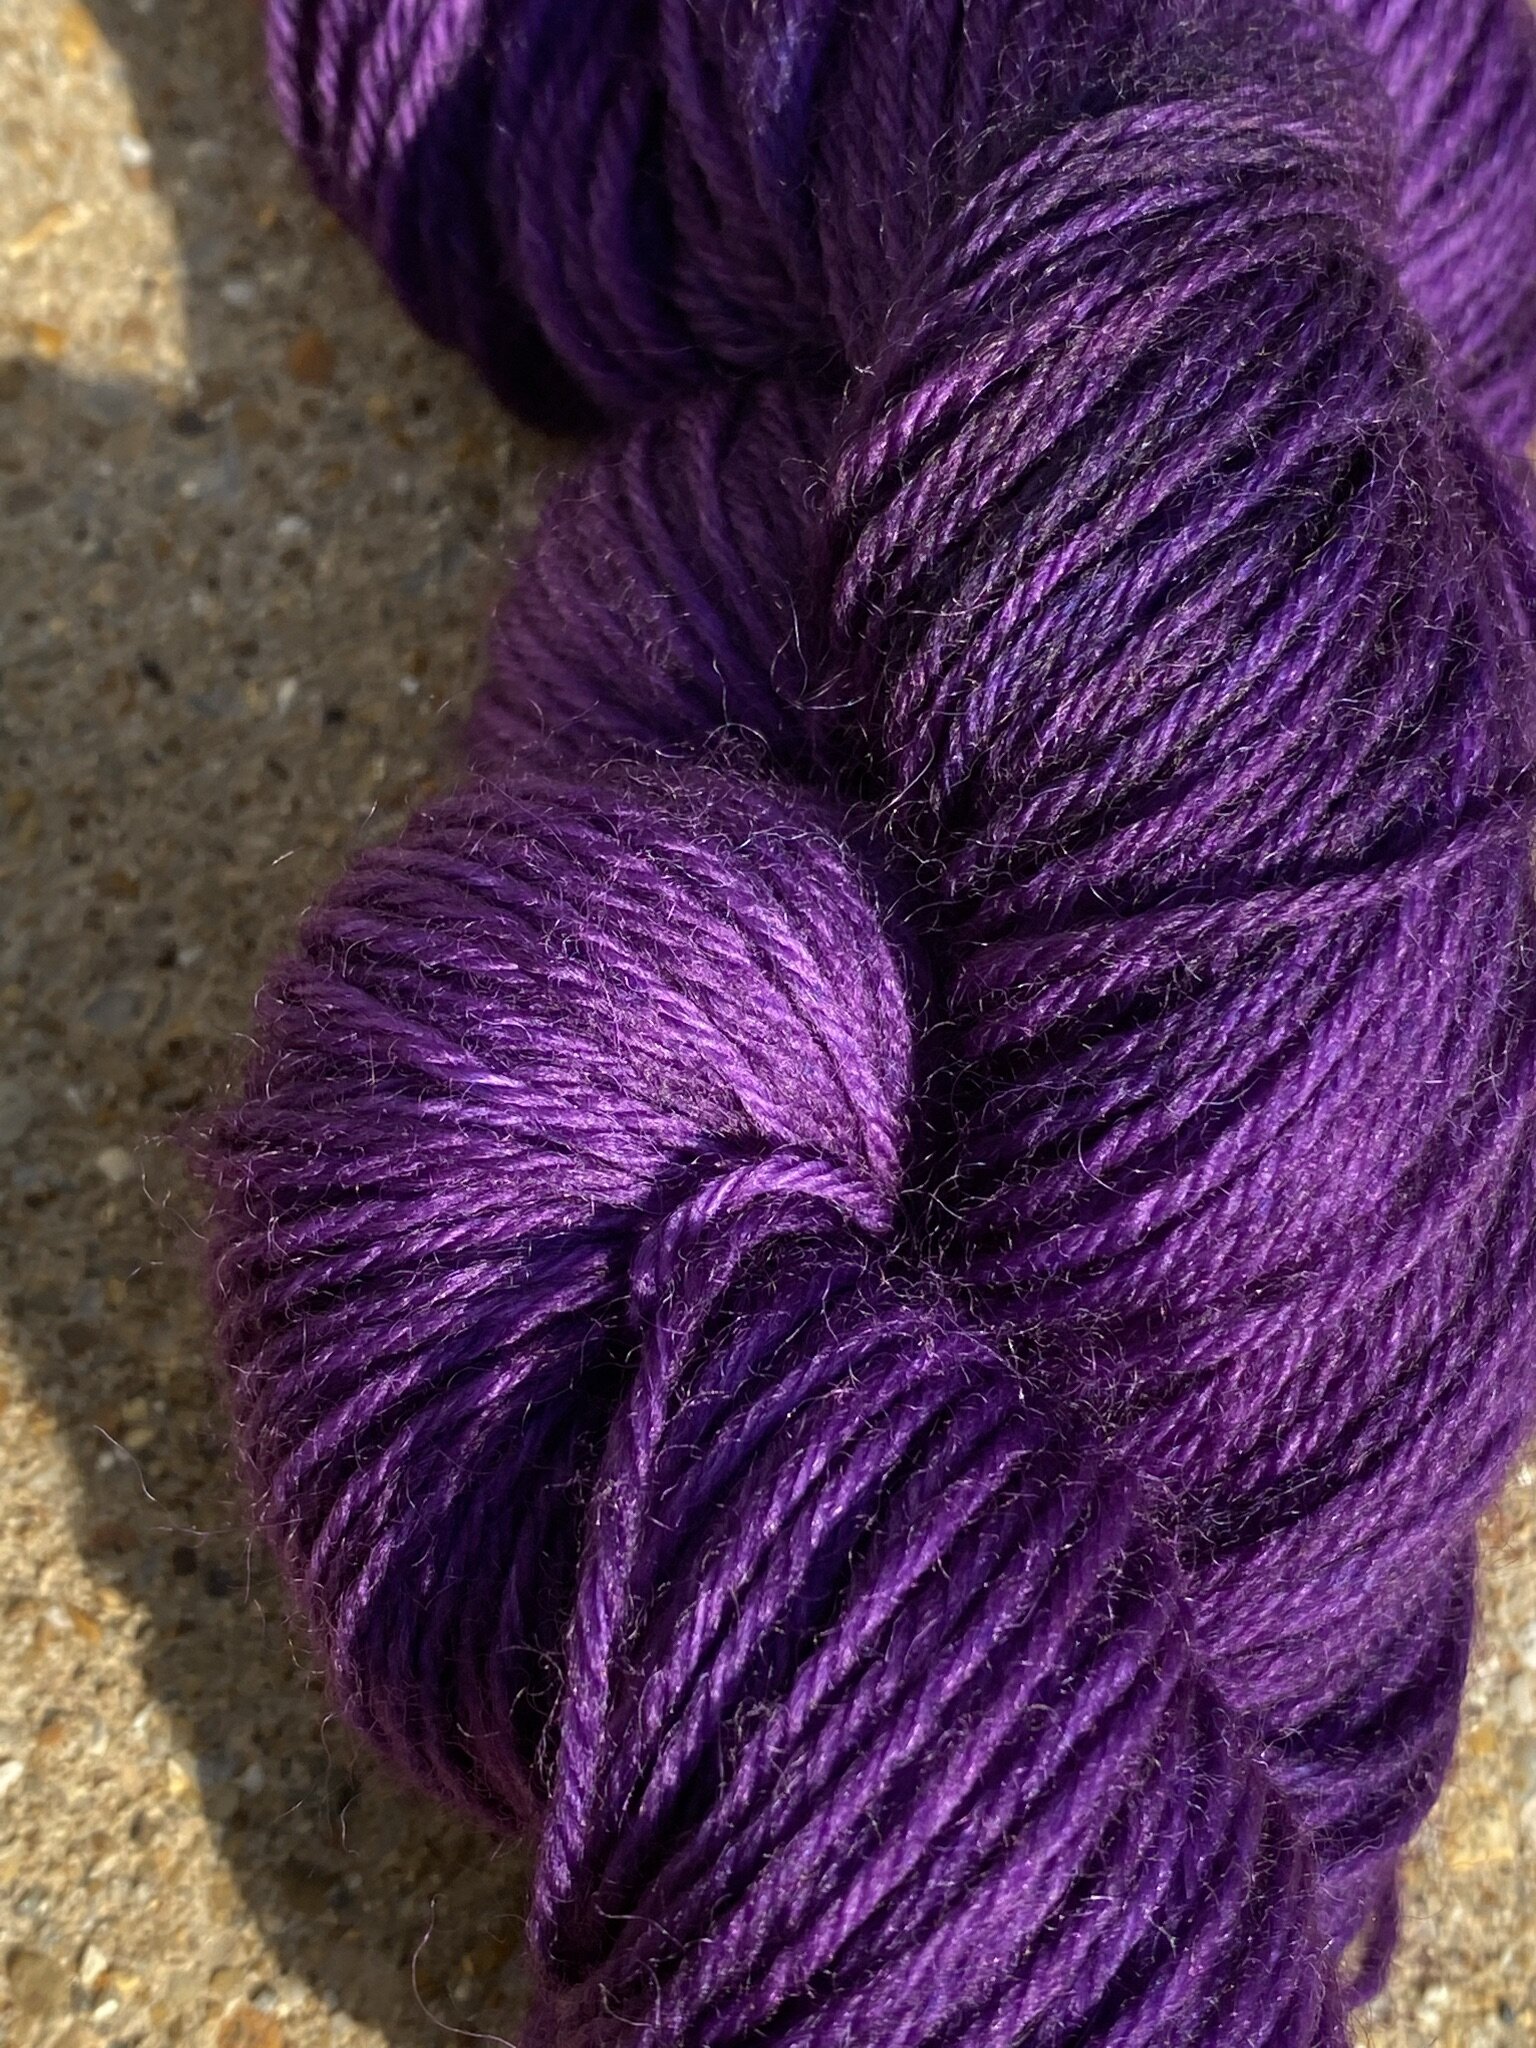
Phoenix solid yarn by cosmicgdesign– purple, 70g = 250m
Hook 4mm
Gauge/tension not important. If you use dk yarn you will produce a larger shawlette.
The shawlette measures as follows:
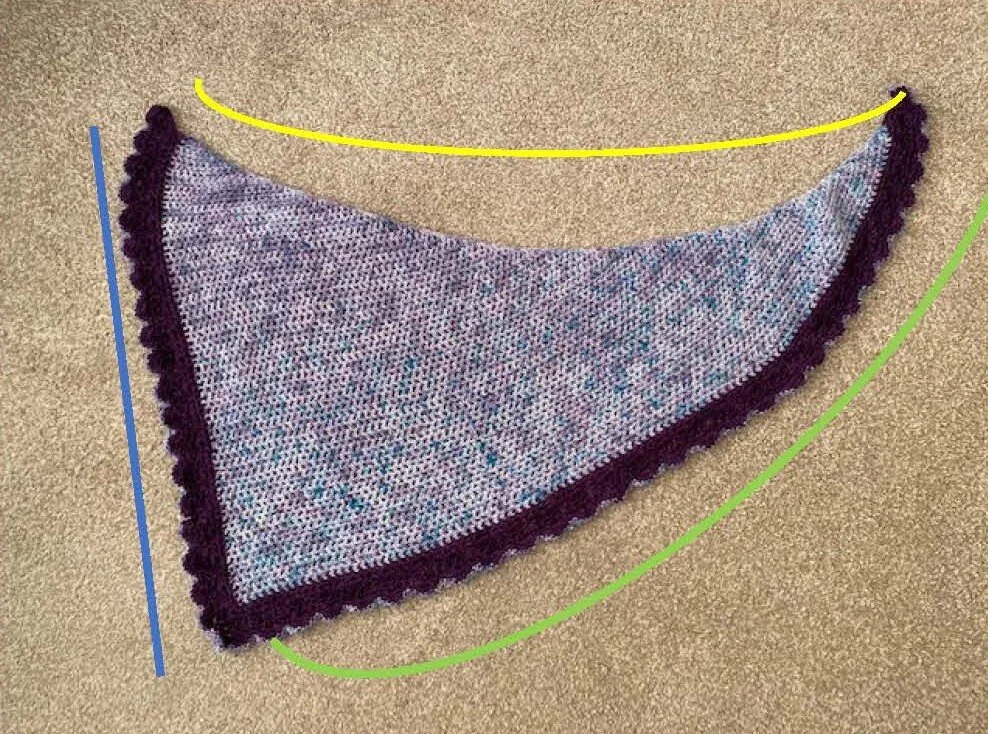
Purple Phoenix Shawlette dimensions
Special stitches Used
UK terminology
Double crochet - dc
Half treble crochet htc
Chain
Picot – chain 4, slip stitch into the same stitch
USA terminology
Single crochet - sc
Half double crochet -hdc
Chain
Picot – chain 4, slip stitch into the same stitch
The stitch used for the main part of the shawlette is the Hollow Herringbone stitch – instructions below:
Hollow herringbone stitch
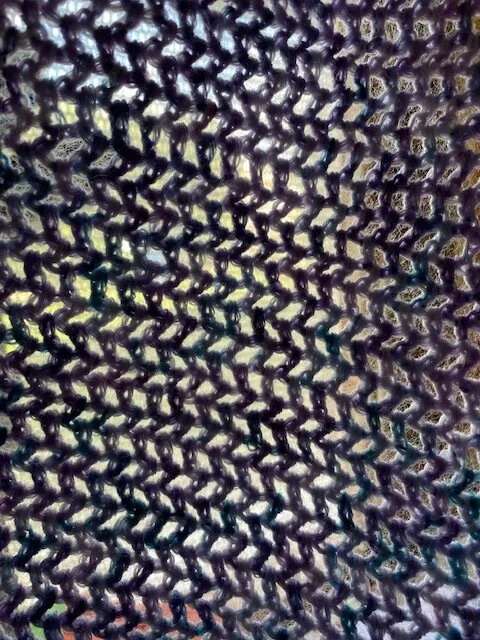
Hollow heringbone stitch with merino wool
Written pattern for Hollow Herringbone stitch:
UK terminology
Multiple of 2 +3 (counts as htc +ch1)
row 1
Htc in the 3rd st from the hook
(Ch1, skip 1, htc in the next st )
Repeat until the end of the row ending with htc
row 2
Ch 2- counts as htc, (htc in the next st, ch 1, skip 1) repeat until the end of the row ending with htc
Repeat row 1 and 2 until the desired length is achieved.
USA terminology
Foundation chain
Multiple of 2 +3 (counts as hdc +ch1)
row 1
Hdc in the 3rd st from the hook,
(Ch1, skip 1, hdc in the next st )
Repeat until the end of the row ending with hdc
row 2
Ch 2- counts as hdc, (hdc in the next st, ch 1, skip 1) repeat until the end of the row ending with hdc
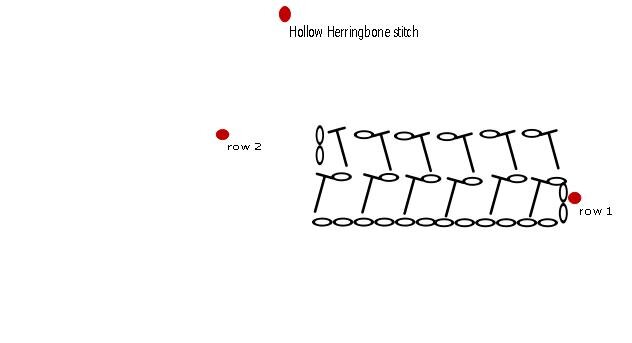
Diagram for the Hollow Herringbone stitch
Written pattern for the Phoenix Shawlette
Part 1 – body of the shawl
However, since we will be working a side-to-side shawlette we will increase on one side and the other will remain straight.
UK terminology
foundatiuon row
With phoenix mix yarn
Chain 4 – counts as htc and chain 1, (make a htc in the first chain, ch 1 – repeat 4 times in total)
You have 5 hdc
row 1
Ch 3 – counts as htc anc ch 1
Htc, ch1, htc ch1, in the first stitch
(Skip htc in the row below, htc in the chain space, ch 1, skip htc) repeat until the end of the row ending with htc.
row 2
Ch 2 – counts as htc , ch 1, skip htc in the previous row
(Htc in the next ch space, ch 1, skip 1) – repeat until the last chain space htc,
Ch 1, htc, ch 1, htc, ch 1, htc
Repeat row 1 and 2 until you have finished 72 rows
Total stitch 364 including the chain spaces.
Row
USA terminology
Foundation row
With phoenix mix yarn
Chain 4 – counts as hdc and chain 1, (make a hdc in the first chain, ch 1 – repeat 4 times in total)
row 1
You have 5 hdc
Ch 3 – counts as hdc anc ch 1
Hdc, ch1, hdc ch1, in the first stitch
(Skip hdc in the row below, hdc in the chain space, ch 1, skip hdc) repeat until the end of the row ending with hdc.
row 2
Ch 2 – counts as hdc , ch 1, skip hdc in the previous row
(Hdc in the next ch space, ch 1, skip 1) – repeat until the last chain space hdc,
Ch 1, hdc, ch 1, hdc, ch 1, hdc
Repeat row 1 and 2 until you have finished 72 rows
Total stitch 364 including the chain spaces.
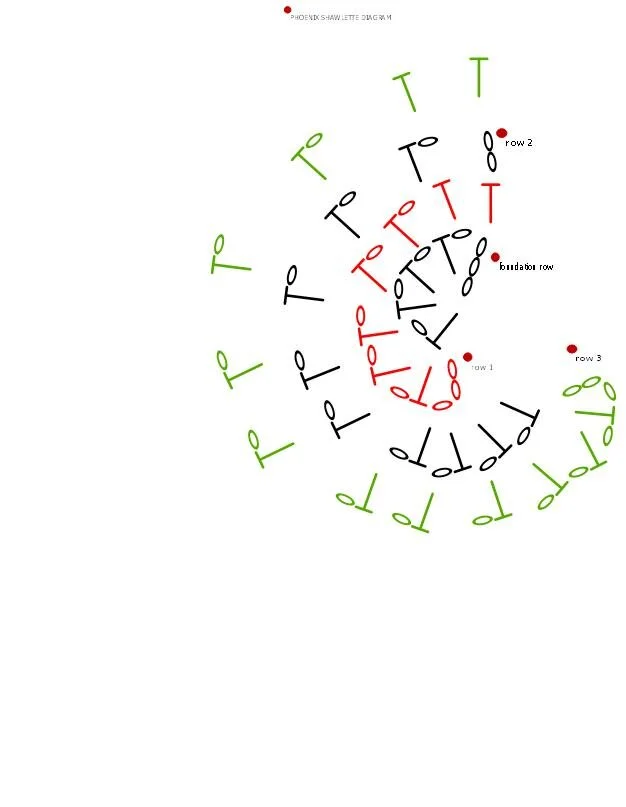
Diagram of the Phoenix Shawlette
Phoenix Shawlette stitch count per row

Phoenix shawlette - stich count per row and increases 1

Phoenix shawlette - stich count per row and increases 2
PART 2 – Border
Once you have finished the body of the shawlette, cut the yarn and attach the purple yarn on the marked spot below shown as yellow circle.
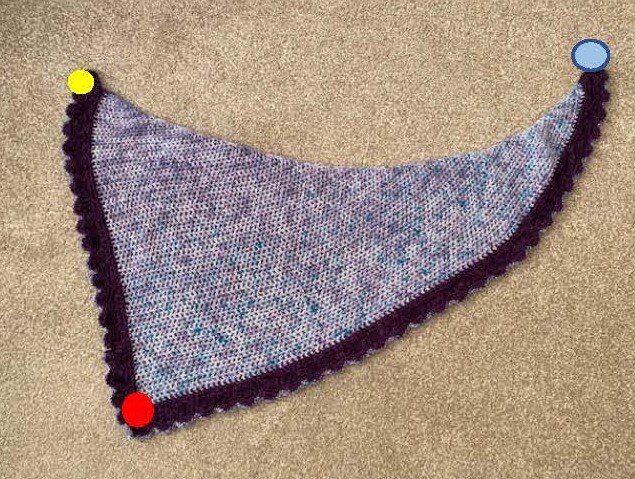
Points of staring rows - Phoenix Shawlette
UK terminology
Continue with row 1 and 2 for total of 2 rows
foundation row
In the corners marked with red circle make
Htc ch 3 htc
And continue with the pattern
row 1
Ch 3 – counts as tc, make 6 tc in the first stitch
(Skip 1 chain space
dc in the next chain space
Skip 1 chain space
7 tc in the next chain space ) repeat until the corner marked with red circle
In the corner make 7 tc
(Skip 1 chain space
dc in the next chain space
Skip 1 chain space
7 tc in the next chain space ) repeat until the end of the row
row 2
Ch 3 – counts as htc +ch 1
Htc in the first st, ch 1
Htc in the second st
Chain 1
row 3
Repeat the foundation chain above for 2 rows
row 4
Repeat row 2 and cut the yarn and weave the end.
row 5
Attach the Phoenix mix yarn at the blue circle shown above
Make a chain 4
And slip stitch into the same stitch – made 1 picot
(Make dc in the next 2 stitches
Make a picot in the next stitch) repeat until the end of the row. Cut the yarn and weave the end.
You are done!
USA terminology
Foundation rows with purple
Continue with row 1 and 2 for total of 2 rows
In the corners marked with red circle make
Hdc ch 3 hdc
And continue with the pattern
Row 1
Ch 3 – counts as dc, make 6 dc in the first stitch
(Skip 1 chain space
Sc in the next chain space
Skip 1 chain space
7 dc in the next chain space ) repeat until the corner marked with red circle
In the corner make 7 dc
(Skip 1 chain space
Sc in the next chain space
Skip 1 chain space
7 dc in the next chain space ) repeat until the end of the row
Row 2
Ch 3 – counts as hdc +ch 1
Hdc in the first st, ch 1
Hdc in the second st
Chain 1
Row 3
Repeat the foundation chain above for 2 rows
Row 4
Repeat row 2 and cut the yarn and weave the end.
Row 5
Attach the Phoenix mix yarn at the blue circle shown above
Make a chain 4
And slip stitch into the same stitch – made 1 picot
(Make sc in the next 2 stitches
Make a picot in the next stitch) repeat until the end of the row. Cut the yarn and weave the end.
You are done!
Happy Crocheting
Gordana