
The Grinch Christmas hat

Here is the short pattern for the Grinch Christmas hat
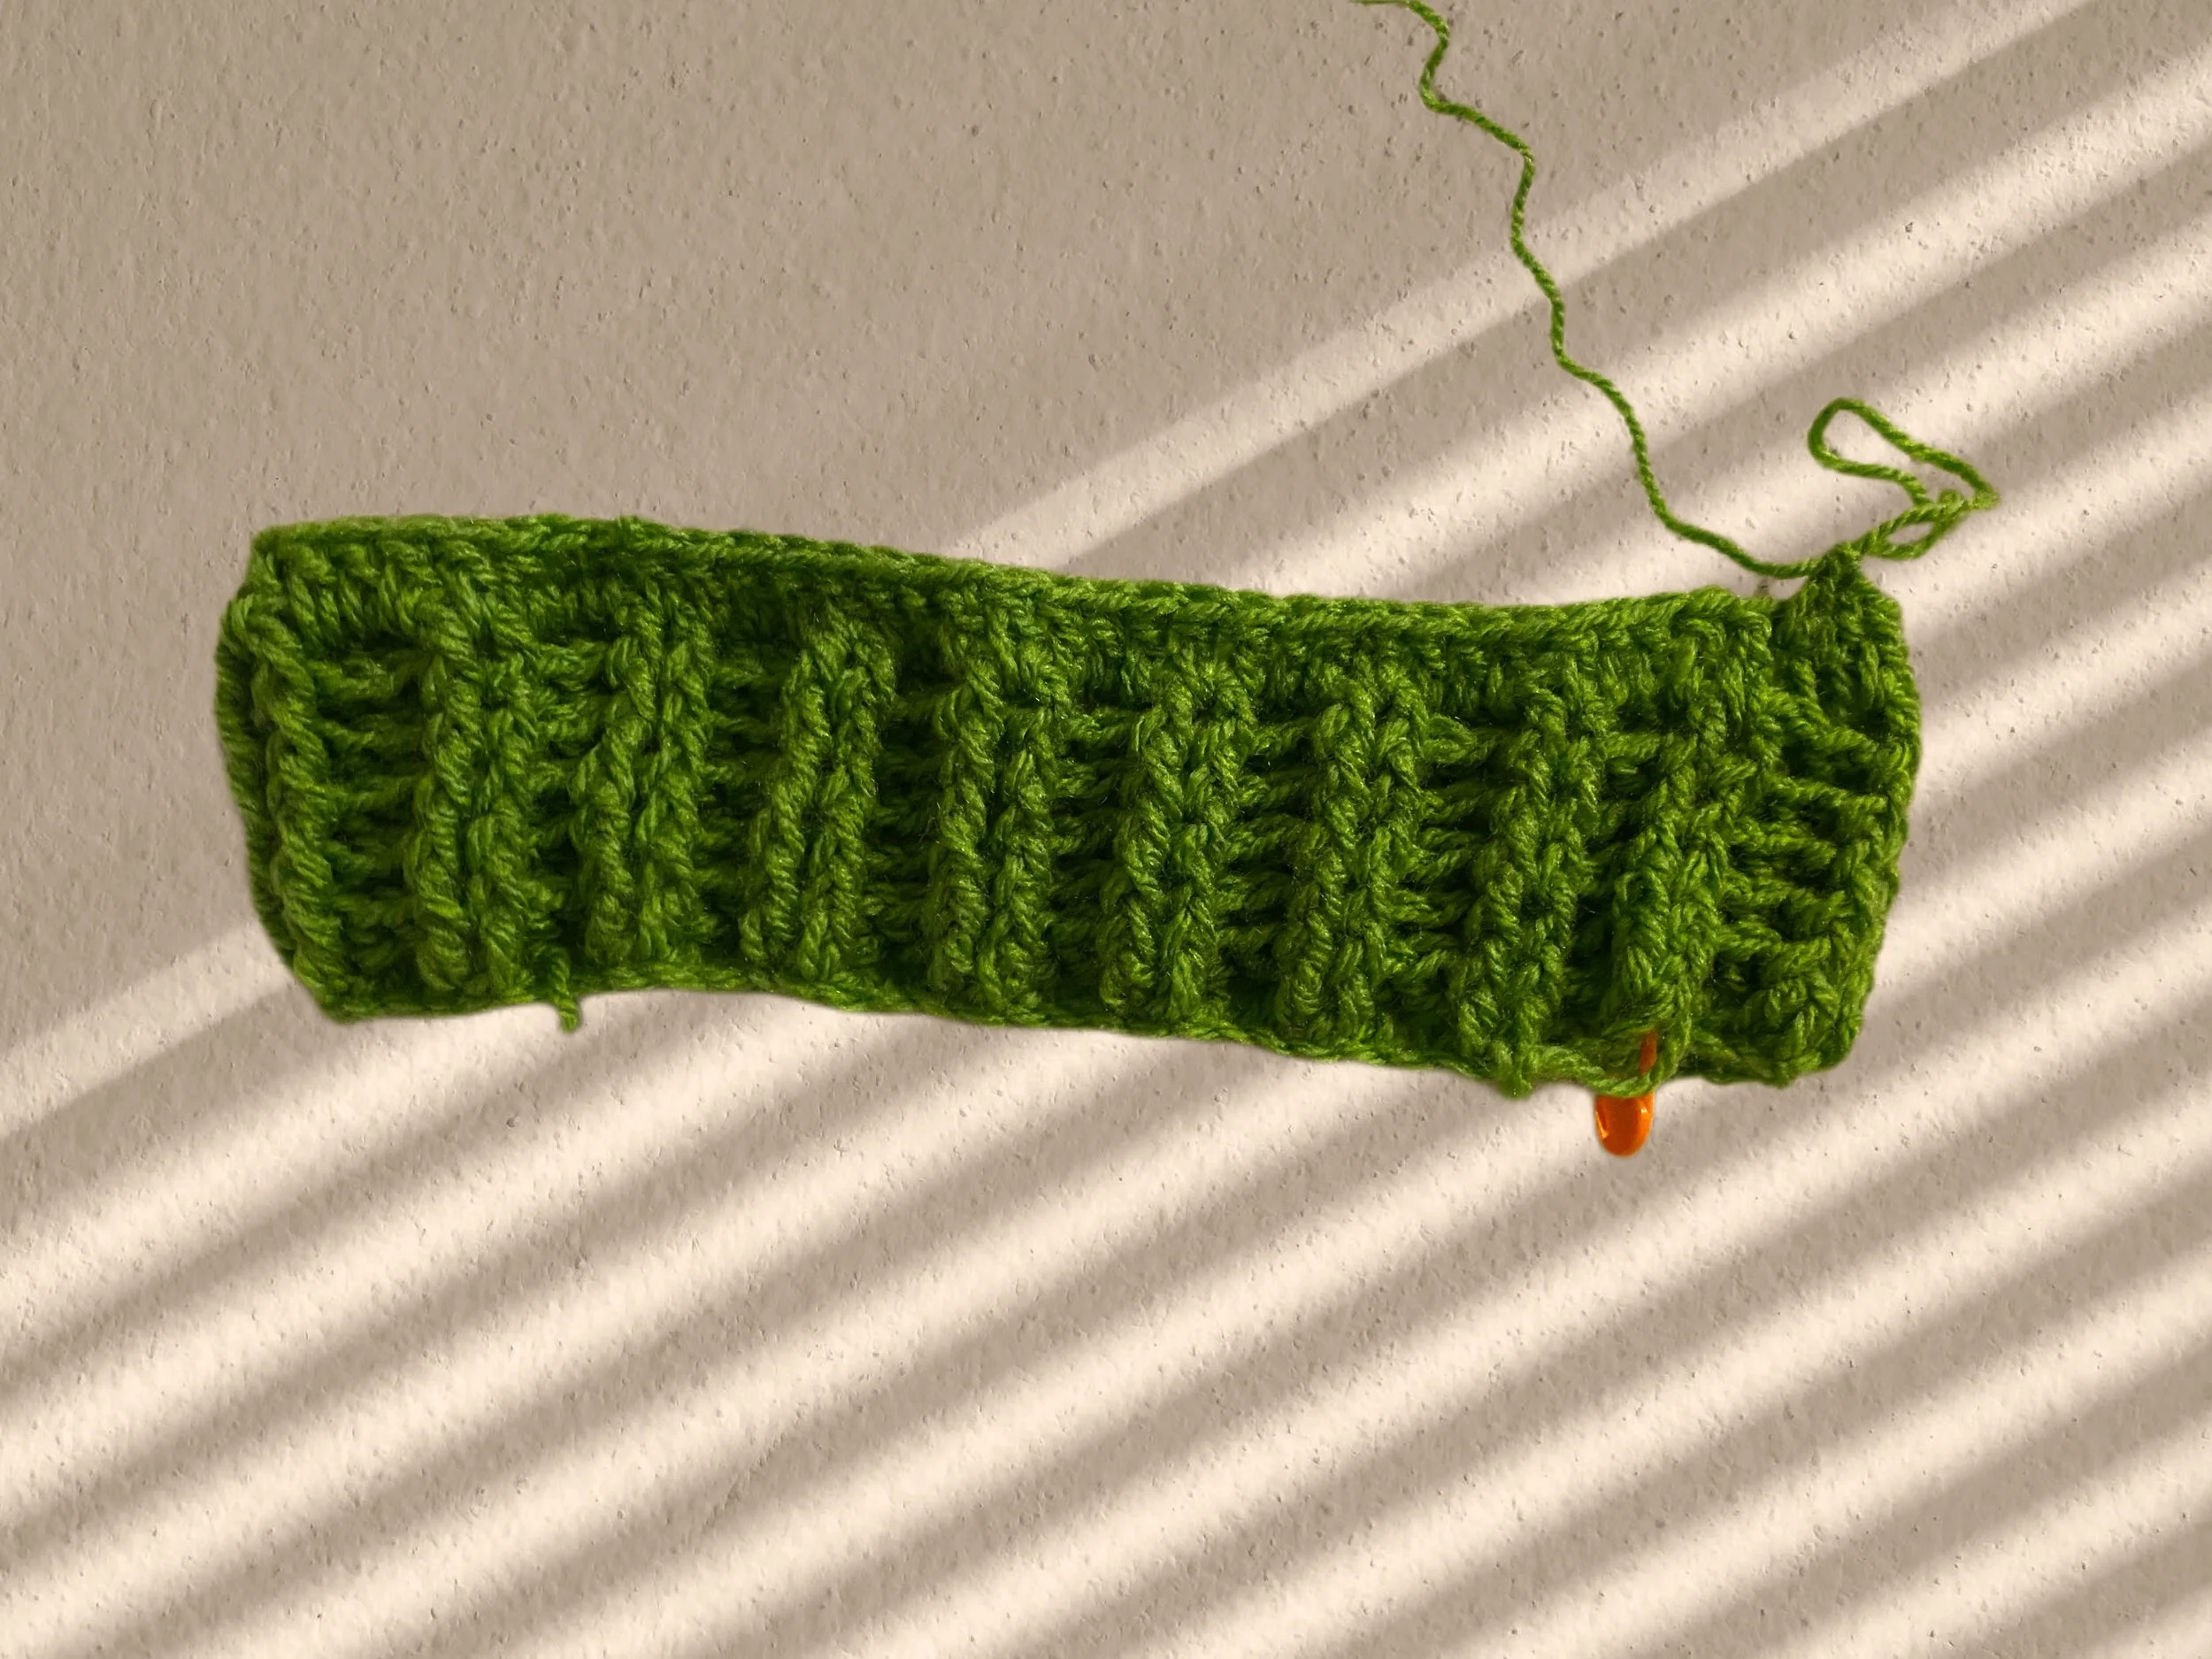
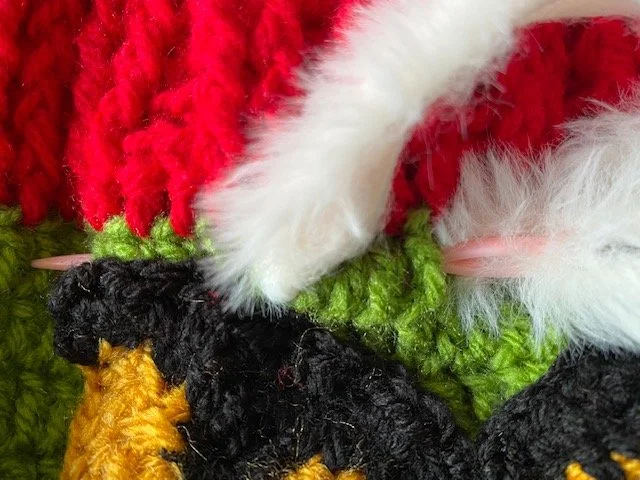
The hat is worked in the round. The red hat on the Grinch is supposed to srand upwards and not fall down to have the effect of the designer.
Yarn
Marriner dc green apple 16
Marriner yarn dk red berry 146
Marriner yarn Black 144
Marriner yarn mustard 136
Sirdar Alpine, Luxe Faux Fur Yarn
4mm hook
The pattern is in both USA and UK terminology – the UK terminology is in bold.
Stitches used
Stich
USA
UK
Dk/tc
Double crochet dc
Treble crochet tc
Front post
Front post double crochet fpdc
Front post treble crochet
Fptc
Chain
Chain
Chain
Slip stitch
Slip st
Slip st
Hdc/htc
Half double crochet
Half treble crochet
Decrease back post
Work 2 bpdc as if they are one
Work 2 bptc as if they are one
Decrease front post
Work 2 fpdc as if theya re one
Woek 2 fptc as if theya re one
Decrease both front and back post
Work 1 fpdc and 1 bpdc as if they are one by making ONE FPDC
Work 1 fptc and 1 bptc as if they are one by making ONE FPtC
Chain 80 (adult female)
Make 84
Youngster 72
If you need different sizes - reduce or add by 4 in the foundation chain
Row/round /colour
USA
UK
Green yarn
Rd 1
dc in each stitch
Tc in each st
Rd 2
(Fpdc in the first 2 st, bpdc in the next 2 st) repeat until the end of the round
(Fptc in the first 2 st, bptc in the next 2 st) repeat until the end of the round
R3
Repeat row 2
Repeat row 2
R4
Repeat row 2
Work fpdc in fpdc and bpdc in bpdc
Repeat row 2
Work fptc in fptc and bpdc in bptc
R5
Repeat row 2
Work fpdc in fpdc and bpdc in bpdc
Repeat row 2
Work fptc in fptc and bpdc in bptc
R6
Repeat row 2
Work fpdc in fpdc and bpdc in bpdc
Repeat row 2
Work fptc in fptc and bpdc in bptc
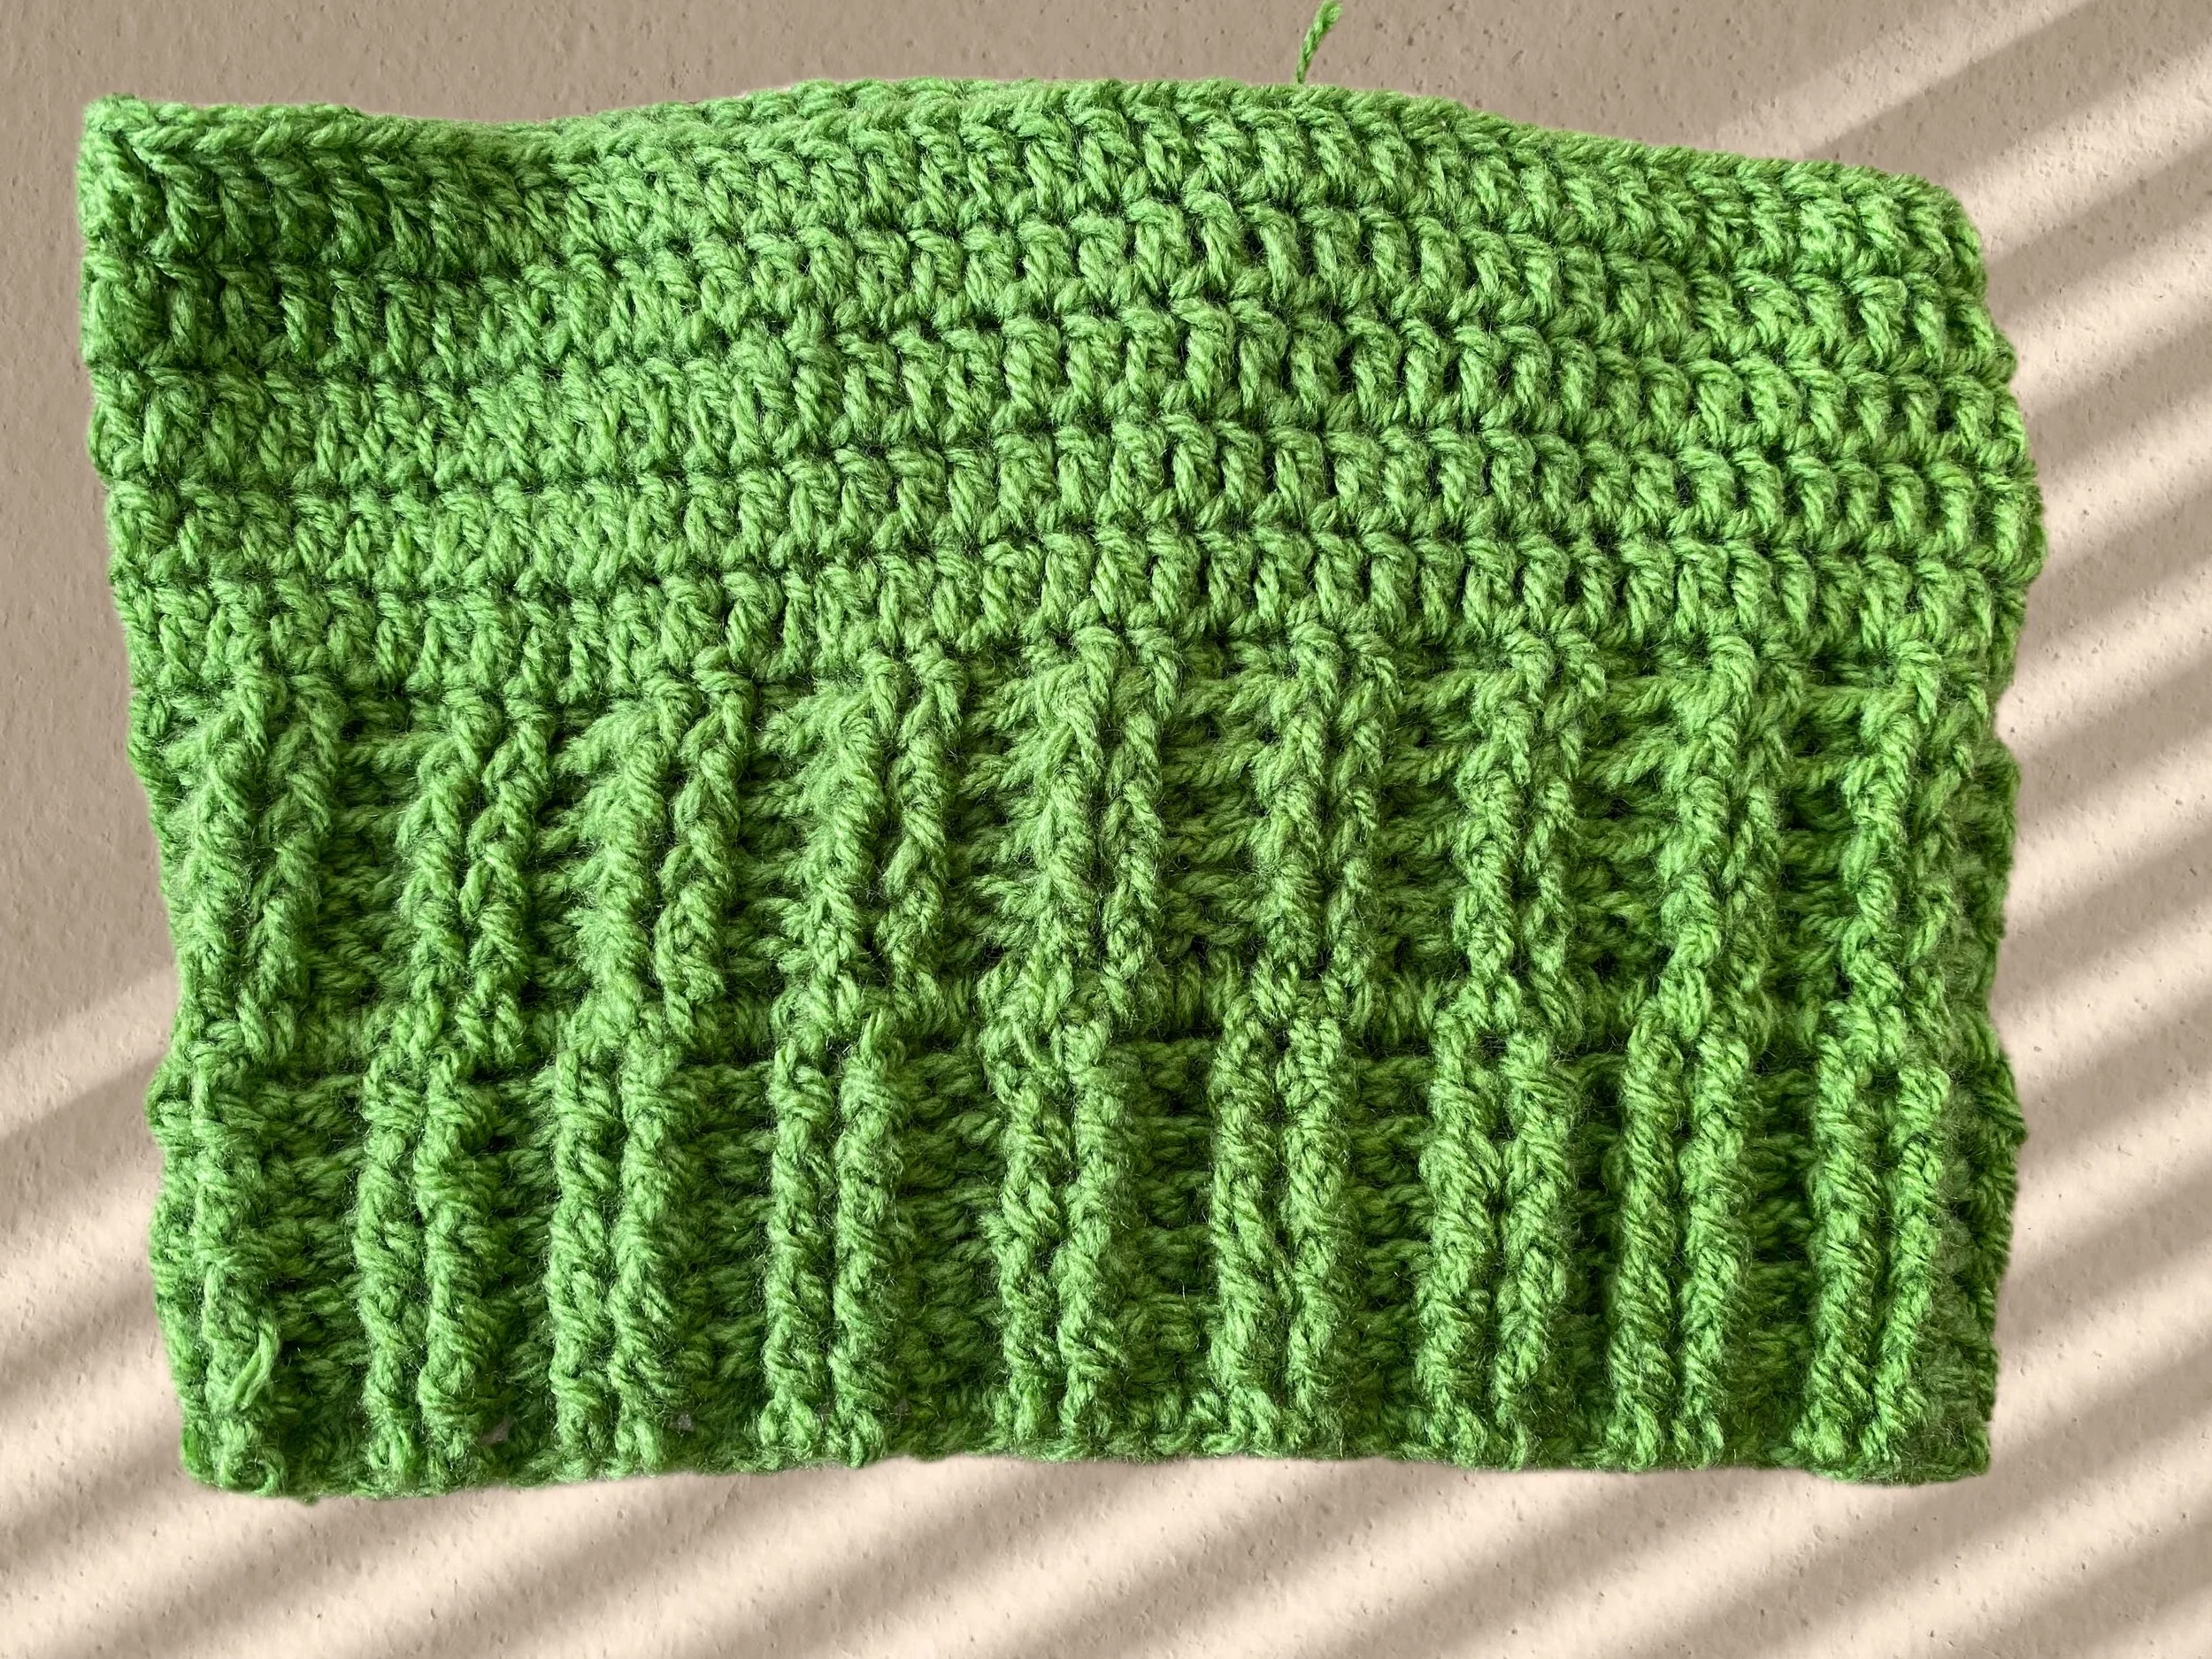
R7
Dc in each st - this will make the brim easily foldable
Dc in each st - this will make the brim easily foldable
R 8
Repeat row 2
Repeat row 2
R9
Repeat row 2
Work fpdc in fpdc and bpdc in bpdc
Repeat row 2
Work fptc in fptc and bptc in bptc
R10
Repeat row 2
Work fpdc in fpdc and bpdc in bpdc
Repeat row 2
Work fptc in fptc and bptc in bptc
R11
Repeat row 2
Work fpdc in fpdc and bpdc in bpdc
Repeat row 2
Work fptc in fptc and bptc in bptc
R12
Dc in each stitch
This is where we will place the eyes
tc in each stitch
This is where we will place the eyes
R13
Dc in each stitch
tc in each stitch
R14
Dc in each stitch
tc in each stitch
R15
Dc in each stitch
tc in each stitch
R16
Dc in each stitch
tc in each stitch
R17
RED YARN
Dc in each st
tc in each st
R18
Work r3
Work r3
R19
Work r3
Work r3
R20
Work r3
Work r3
R21
Work r3
Work r3
R22
Work r3
Work r3
R23
Work r3
Work r3
R24
Work r3
Work r3
R25
In this round we make a decrease in back post stitches – the decrease is made ever other back post
i.s. we have 2 fpdc, we make 1 back post from the 2 back post st,
then we have another front post, then we work 2 back post dc
then again 2 front post
and we again decrease the 2 back post stitches into one
In this round we make a decrease in back post stitches – the decrease is made ever other back post
i.s. we have 2 fptc, we make 1 back post from the 2 back post st,
then we have another front post, then we work 2 back post tc
then again 2 front post
and we again decrease the 2 back post stitches into one
R26
In this round we make the decrease of the 2 back post stitches that are remaining
We make 2 fpdc, 1 bpdc, 2 fpdc, and decrease 2 bpdc into one bpdc
Note: at the end of the round there should only 1 bpdc between the fpdc
In this round we make the decrease of the 2 back post stitches that are remaining
We make 2 fptc, 1 bptc, 2 fptc, and decrease 2 bptc into one bptc
Note: at the end of the round there should only 1 bptc between the fptc
R27
We work by making fpdc in fpdc and bpdc in bpdc
We work by making fptc in fptc and bptc in bptc
R28
In this round we decrease 2 fpdc into one every other set of fpdc
In this round we decrease 2 fptc into one every other set of fptc
R29
In tis round we decrease the remaining fpdc into one
At the end of this round there should be only 1 fpdc left between the single bpdc
In tis round we decrease the remaining fptc into one
At the end of this round there should be only 1 fptc left between the single bptc
R30
Work fpdc into fpdc and bpdc into bpdc
Work fptc into fptc and bptc into bptc
R31
In this round we decrease one fpdc and bpdc into one fpdc
We work both stitches as if they are one
We do this to all set of fpdc and bpdc
In this round we decrease one fptc and bptc into one fptc
We work both stitches as if they are one
We do this to all set of fptc and bptc
R32
Repeat round 30
Repeat round 30
R33
We decrease every 2 fpdc into one fpdc
Continue decreasing until there is no stitches left
Leave a long tail and cut the yarn
Weave the yarn so it closes any gap that might be left
Place the yarn to the inside of the hat
We decrease every 2 fptc into one fptc
Continue decreasing until there is no stitches left
Leave a long tail and cut the yarn
Weave the yarn so it closes any gap that might be left
Place the yarn to the inside of the hat

Attach pompom
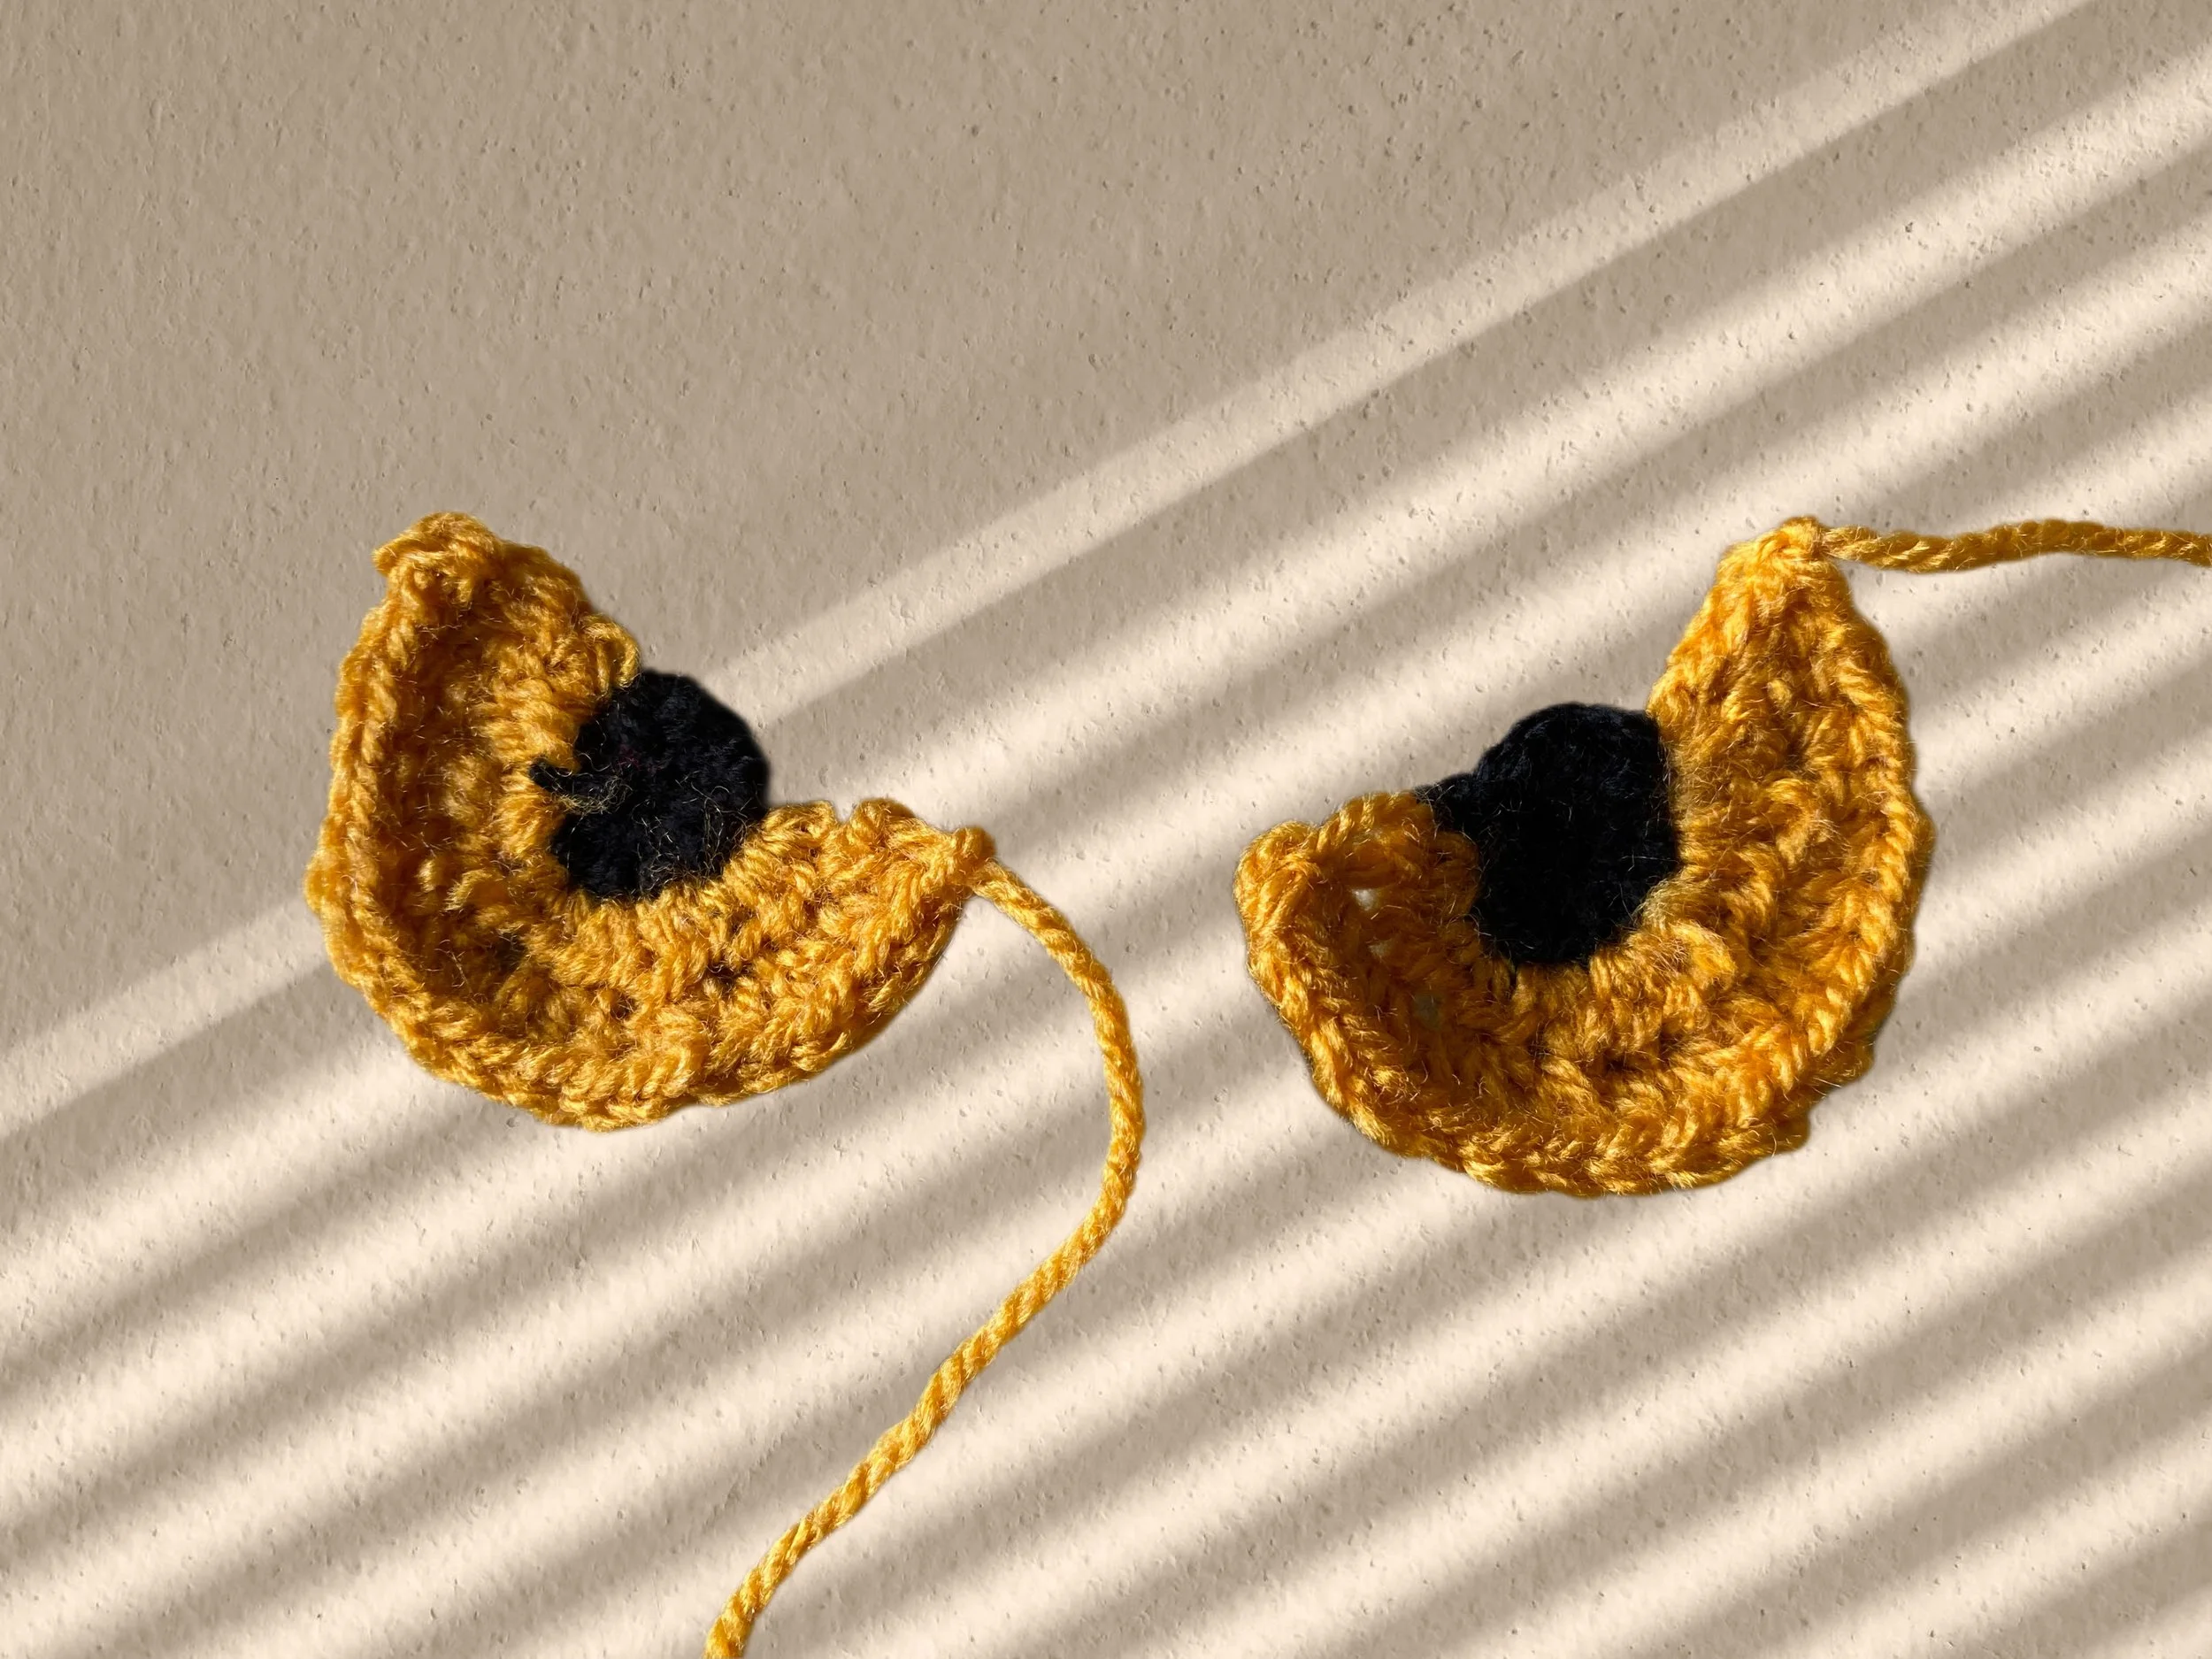
Making the eyes
2.5 mm hook
Black yarn
Chain 4
Make 10 hdc in the first chain
Chain 4
Make 10 htc in the first chain

Mustard
Attach the yarn in any stitch
Make 2 hdc in 7 stitches
Attach the yarn in any stitch
Make 2 htc in 7 stitches

Mustard
Make hdc in each mustard st
Make htc in each mustard st
Black yarn
Attach the yarn in one of the mustard corners
2 hdc in each row or stitch
Attach the yarn in one of the mustard corners
2 htc in each row or stitch
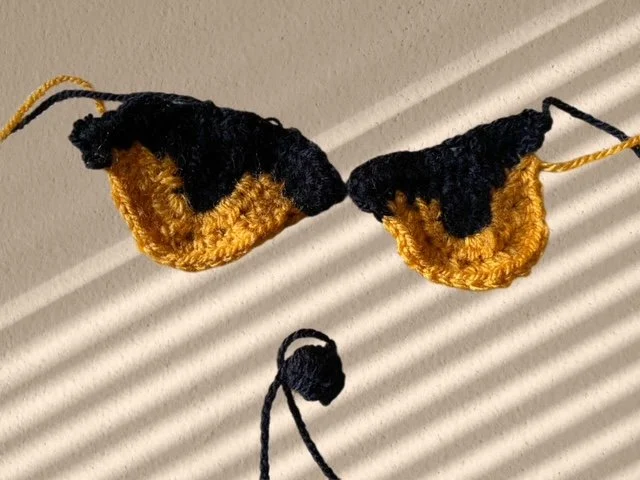
Nose
Chain 4
Make 5 unfinished dc and pull through all loop on the hook
Slip st in the 1 ch space
Chain 4
Make 5 unfinished tc and pull through all loop on the hook
Slip st in the 1 ch space
Weaving faux fur
On a large eye needle attach long string of the fur yarn and double it
Go trough 7 stitches and pull up
Go back 6 stitches
Go in on the 6 st for 7 st
On a large eye needle attach long string of the fur yarn and double it
Go trough 7 stitches and pull up
Go back 6 stitches
Go in on the 6 st for 7 st foreward until you have reached the desired height of the faux fur yarn

All done !
happy crocheting
Gordana xx